Ken Schwartz is one of the masterminds behind the popular Son of a Fermentation Chiller that is all over the DIY-homebrew forums. Ken discusses the inspiriation as well as the evolution of his fermentation chiller design in the following feature.
Summertime here in the desert reminds me of why I developed the fermentation chiller way back when. Allow me to crack open a cool homebrew. In fact, why don’t you do the same, and kick back while I tell you a story.
I began homebrewing back in the bleak Winter of ’92. Bleak, not because of the weather, but because the internet was a mere bud and had not yet bloomed into the vast homebrewing-information resource it has become. Finding information on how to make beer at home was not easy, and what information I did find was mostly as old and stale as the brown hops in the back corner of the cookware store in the mall.
Even so, I managed to brew a couple of pretty passable batches, and I eagerly looked forward to a summer filled with chilled homebrews and the relaxation of spending afternoons boiling wort. But my enthusiasm soon turned to disappointment as my warm-weather batches began to taste more and more “off.” What had changed? My technique and attention to sanitation had, if anything, improved. But in the absence of any troubleshooting resources, I gave up brewing.
After a few months, my wife asked me if I planned to ever brew again. I took that as incentive to try again. Blindly I went forward, doing whatever it was I did the last few times and—wow, decent homebrew! About the same time, I found our local homebrew club, and after talking to a few new friends I made the connection between fermentation temperature and clean-tasting homebrew.
 But what options did I have for brewing between Valentine’s Day and Thanksgiving? My garage (and the rest of the house for that matter) became too warm during that part of the year to keep the yeast happy. A refrigerator or freezer dedicated to fermentation was not an option. But a clever club member, former co-worker, good friend, and fellow engineer had been using a technique that seemed to work pretty well. He had fashioned a cabinet out of plywood and Styrofoam, wherein he would place the fermenter and a couple of milk jugs that had been filled with water and frozen. A poor man’s refrigerator in his bedroom closet! But I found at least two things objectionable—its size and weight, and the fact that you got whatever temperature the ice and fermenting wort gave you. A hell of a lot better than nothing, but given its bulk, I might as well just get a small chest freezer. Back to square one. The basic idea seemed clever enough, but how could I improve on what I saw to be its main flaws? This is right where an engineer lives: a challenging problem with tasty beer its solution’s reward.
It seemed to me that I could forgo the cabinet’s plywood skin, making the box much lighter, smaller, and certainly much easier to build. Heck, you could set this thing up on a shelf or in a shed when you weren’t using it! As for the temperature control, suppose a thermostat operated a fan that would circulate cold air when needed, yet isolate it from the fermenter when not needed?
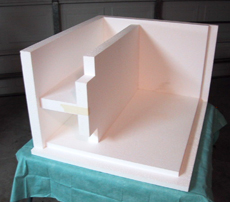
Recalling that “cold air falls,” I pictured a reservoir of cold air behind a barrier that would be released on command, then cut off when the fermenter was happy. If the vents were placed at the top of the barrier, a fan could pull the cold air out and circulate it when needed. Turn off the fan, and the cold air settles again. A divider panel in the cold section of the box would divert air down from the inlet vent, where it would focus onto the ice, then back up the other side and through the outlet vent to the fermenter.
After a few sketches, a design sprang forth. I aimed to get the whole thing to come off a standard four-by-eight sheet of foam. I used a cheap heat/cool thermostat so that I could set the temperature as low as 55°F (I was making only ales and did not need near-freezing temperatures).
 Using two jugs of ice, I could maintain a set temperature within a degree or two, even as my garage heated above 95°F in late June. The ice lasted a couple of days, even in this heat, and so I would rotate the jugs with fresh ones out of the freezer. I never was much of a lager brewer, partly due to my environment, partly due to laziness, but in any case the chiller is not particularly effective at maintaining lagering temperatures for very long, even in a cool ambient environment. Feel free to give it a try of course, but if you intend to build one with lots of lagering in mind, it might not be your best approach.
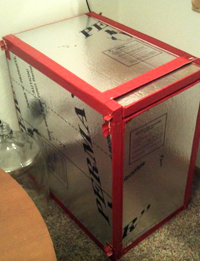
The original design required the two jugs to be stacked; I adjusted the dimensions so that each jug sat on the floor of the chiller. This and a few other tweaks constituted revision 2: “Son of Fermentation Chiller.” I had used construction-grade “extruded polyurethane” foam (the dense pink stuff); it seemed the cheap bead-board from the home stores was not durable enough for good service.
But after publishing plans in 1995 on the internet, I received countless emails from people describing a number of modifications, and even some who found the cheap foam to work just fine. In 2001, a fellow homebrewer and furniture maker and I began to offer chiller kits for sale. Klaus had proven that the chiller could be simplified using friction-fit removable panels, instead of the dowel-peg scheme I had originally specified. Additionally, I designed a custom electronic thermostat for the kit. When Klaus moved out of town, we stopped selling the kits, but the original plans for the chiller remain on my website. In the years since then, I haven’t been brewing quite as much, but when I do, the chiller takes center stage while the yeast feast.


Share Post