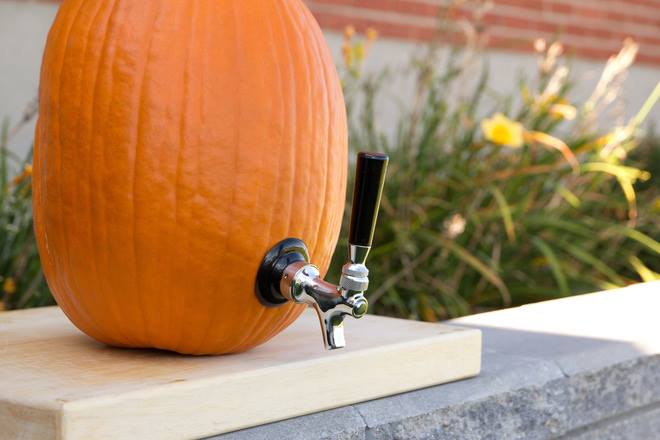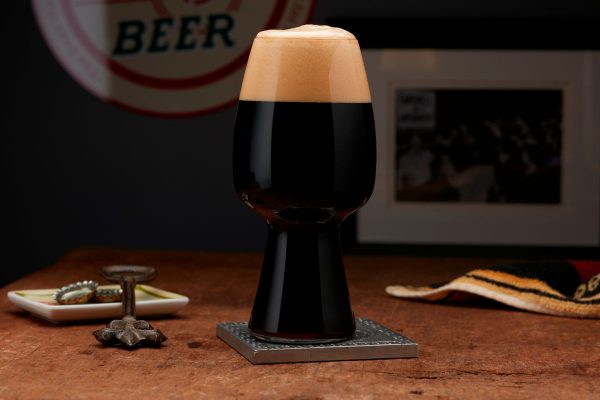
Bring your pumpkin beer obsession to the next level with pumpkin kegs!
That’s right. The same pumpkins you carve into spooky jack-o-lanterns can be modified to serve your homemade pumpkin beer. Not only will the unusual beer keg catch the eyes of friends at your Halloween party, but it can also add some fresh pumpkin flavor to the beer that is being served, whether it’s homebrew or store-bought.
Not into pumpkin beer? Try these serving techniques with a watermelon!
Preparing the Pumpkin
Making a pumpkin keg is easy. You’ll need:
- 1 pumpkin large enough to hold your desired volume of beer
- knife
- large metal spoon
- pen
- torch (optional)
- spare keg faucet and shank setup or a pumpkin keg tap kit
First, start as you would with any jack-o-lantern by cutting off the top around the pumpkin’s stem. Remove the top and cut off any of the seed and fiber material that is stuck to it. Using the large spoon, scrape out all of the seeds and fibrous strands. Be careful not to scrape the inside walls of the pumpkin too much. You want to leave enough to allow the pumpkin to hold it’s form when full and prevent the beer inside from seeping out.
With the pumpkin hollowed, you now have two options. Some people will leave the inside of the pumpkin as-is, which will infuse some subtle, but noticeable raw-pumpkin flavor. Others will char the inside of the pumpkin with a torch. This will reduce the amount of raw flavor infused into the beer, but will introduce char and burnt sugar qualities into the beer. For those who don’t want their beer soaking in a pumpkin, check out the pumpkin jockey box option (below).
Now it’s time to determine where the faucet will be placed that will be used to dispense the beer. The tap system is essentially a straight faucet and shank set up, so it would be best to place the faucet as close to the bottom of the pumpkin to reduce the dead space (an area where beer cannot be poured through the faucet unless the pumpkin is tilted forward), while still being able to sit the pumpkin keg on a table. Mark where the faucet shank will go through the pumpkin wall with a pen by tracing around the shank. Use a small knife or pumpkin carving tool to cut out the hole. It is better to cut it a bit to small and gently force the shank through, rather than cut the hole too big and have to deal with leaks.
Securely tighten the faucet to the shank and consider putting just enough water in the pumpkin to test if it’s sealed tightly. If there are leaks, consider playing it safe and preparing a new pumpkin. A few extra dollars is worth the headache of cleaning up a leaking a keg…
Serving Beer from a Pumpkin Keg
Unlike traditional homebrew kegs which can be force carbonated, a pumpkin keg needs to be filled with already-carbonated beer. Essentially, a pumpkin keg is more like a growler with a tap faucet. That being said, there have been some daring homebrewers who have used pumpkins as fermenters or tried conditioning beer in a pumpkin by sealing the lid with wax, but this can be very messy and pumpkins are not rated for high levels of pressure.
So this all means that carbonated beer must be racked into the pumpkin keg and the beer should be consumed within a short span of time. Any beer, whether store bought or homebrewed, can be poured into the pumpkin, but consider using a racking cane if transferring homebrew to prevent foaming.
Place the pumpkins top back on, open the faucet and watch delicious beer flow straight form a pumpkin!
The Pumpkin Jockey Box
Not everyone wants their beer to sit in a raw pumpkin, whether for practical or flavor reasons. We understand, and luckily there is an easy work around to still serve beer from a gourd without the beer actually sitting inside a hollowed out pumpkin.
Essentially, a pumpkin can be turned into a jockey box. A jockey box is typically a cooler with mounted keg taps on it. The faucets are connected to a keg via beer lines, and most of the line is coiled inside the cooler along with some ice to keep the beer at proper serving temperatures. The same can be done with a pumpkin.
If you have a keg faucet/shank, prepare the pumpkin as mentioned above, but instead of adding beer once the faucet is installed you will do the following. First, connect the faucet to your keg using beer line tubing. If the keg is going to stay in a fridge, then you can basically stop there and start serving. If the keg is going to be unrefrigerated, you can coil some of the beer line into the pumpkin and add ice, but anticipate some tinkering of the line length and coils to manipulate the amount of foam that is poured.
An even cheaper solution to the faucet and shank method is to simply stick a picnic tap through the pumpkin wall and connect it to the keg.


Share Post