I’ve fermented quite a few batches of beer, mead, and cider at home. Typically they bubble away in a closet or fermentation chamber: places where they are out of sight (and smell).
It wasn’t until I had a 5-gallon batch of cider in my office that I truly noticed just how strong the odors leaving the conical can be in the first 72 hours of fermentation. We’re talking rotten eggs, sulfur,…farts.
I knew I had to come up with a solution to the problem after coming back to work only to smell that someone had stealthily nuked my office with a healthy dose of air freshener.
After telling a brew-buddy about my stinky predicament, he clued me in on a cool way to rig up a smell-proof airlock that he had seen on HomebrewTalk. I loved the idea and set out to see if I could build my own version using only things I had around the house.
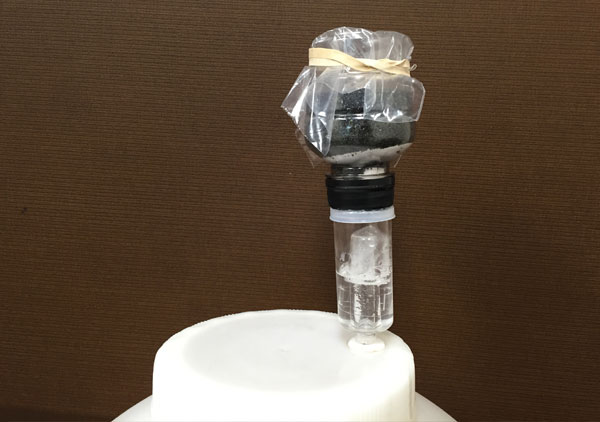
The basic concept is to rig a filter to the top of an airlock that helps strip the fermentation smells from the CO2 being emitted through the airlock during fermentation.
Using the HomebrewTalk thread as inspiration, I came up with a design that used only things found in my apartment that would be simple to make yet effective. Follow along, or try making your own version using what you have on hand!
What is Activated Carbon?
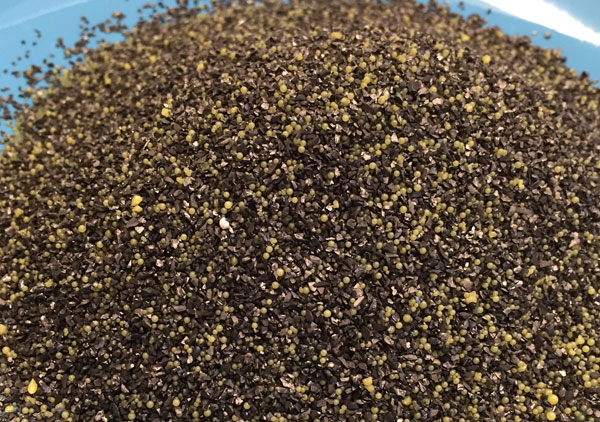
Activated carbon, also called activated charcoal, is a form of carbon processed to have small, low-volume pores that increase the surface area available for adsorption or chemical reactions.
Activated carbon is commonly found in household water filters.
Source: Wikipedia
Building Smell-Proof Airlock
Materials
- Three-piece airlock
- Unused Brita water filter
- A couple cotton balls/pads
- Empty/clean plastic bottle with cap the same size (or slightly larger) as the airlock cap.
- Plastic wrap or small plastic bag
- Rubber band
Tools
- Scissors
- Razor blade
- Glue (something that works well with plastics)
- Plate or bowl
- Small nail or thumbtack
How to Build
Follow these steps and you’ll have yourself a odor-eating airlock in no time:
- Start by gluing the top of the plastic bottle cap to the top of the airlock cap. Use enough glue for a secure fit and allow to dry completely. I also recommend gluing around the edge of where the two caps meet for a tight bond. Set the cap aside and allow to dry completely (follow the directions of the glue you’re using).
- Take the Brita water filter and flip it upside down. Using scissors, poke holes through the four small screens and empty out the contents (activated carbon) onto a plate or bowl. This activated carbon is what will act as the filter. See the picture below.
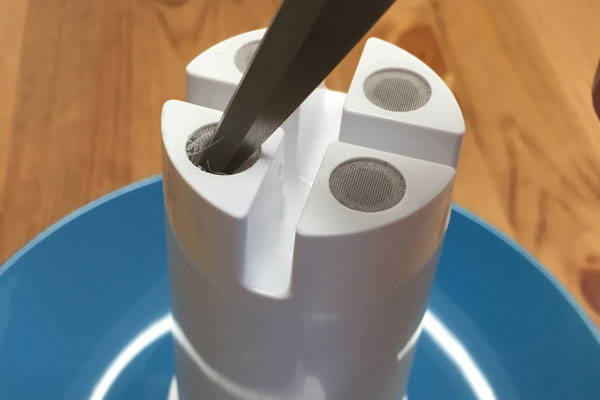
Water filters, like this Brita filter, are filled with activated carbon.
- Cut the water bottle in half, or small enough that it can hold the entirety of the activated carbon. You don’t want the airlock to be too top heavy, so try to be as exact as possible. You will have an opportunity to trim it down later if needed. Throw away the bottom part of the bottle.
- Once the cap is completely dry, take the small nail or thumbtack and poke a bunch of holes through the two caps, which will allow escaping CO2 to pass through. Don’t be shy on the holes, and make sure they go all the way through. (Note: you may notice the caps starting to lose their bond while poking holes. After you poke all the holes, take your glue and re-glue around the edges of where the two caps meet and allow to dry completely before moving on to step 5).
- Screw the cap onto the water bottle and flip the water bottle upside down so the cut portion faces up. Stuff a few cotton balls into the bottom of the water bottle, which will prevent the carbon from making its way into the airlock. See the picture below.
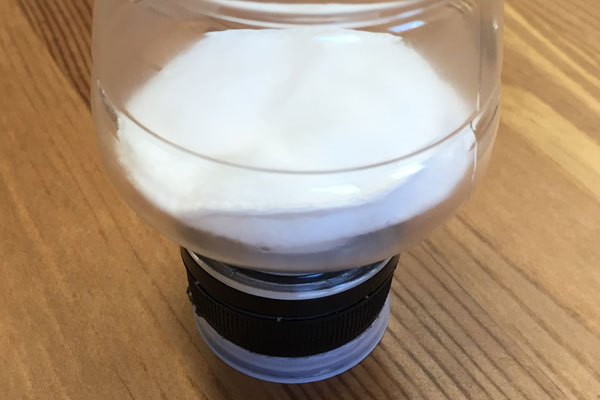
I bunched up a few cotton pads and stuffed them in the cap, then laid a few flat atop to make a bed for the activated carbon.
- Once the cotton balls are in place, carefully pour in the activated carbon atop the cotton balls. Once all the activated carbon is in place, you can trim the bottle down to size if it is too tall.
- Using plastic wrap or a small plastic bag, cover the top of the bottle and use a rubber band to keep it in place. Using a small nail or thumbtack, poke a bunch of holes in the plastic to allow CO2 to pass through.
- Finally, attach your new filter (a.k.a. the bottle) to the airlock by attacking it to the airlock’s cap that is glued to the bottle cap.
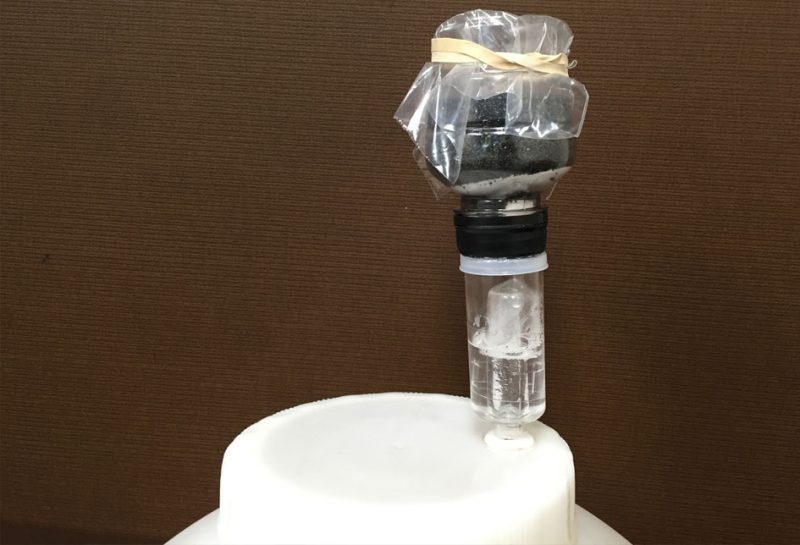
The final product. It might not be prettiest airlock filter, but it’ll work!
Now’s your chance to make sure everything is secure and working properly. Add more glue to the caps if need be, and blow through the bottom of the airlock to make sure air can pass through. Once you’ve confirmed it’s good to go, fill it with a sanitary solution and stick it on your fermenter.
* * *
Duncan Bryant is web coordinator for the American Homebrewers Association.


Share Post