Fermentation expert Dr. Julia Skinner put together this special guide just for Home Fermentation Day. It’s packed with tips, variations, and ideas to help you get fermenting—whether you’re brand new or a longtime DIYer.
By Dr. Julia Skinner
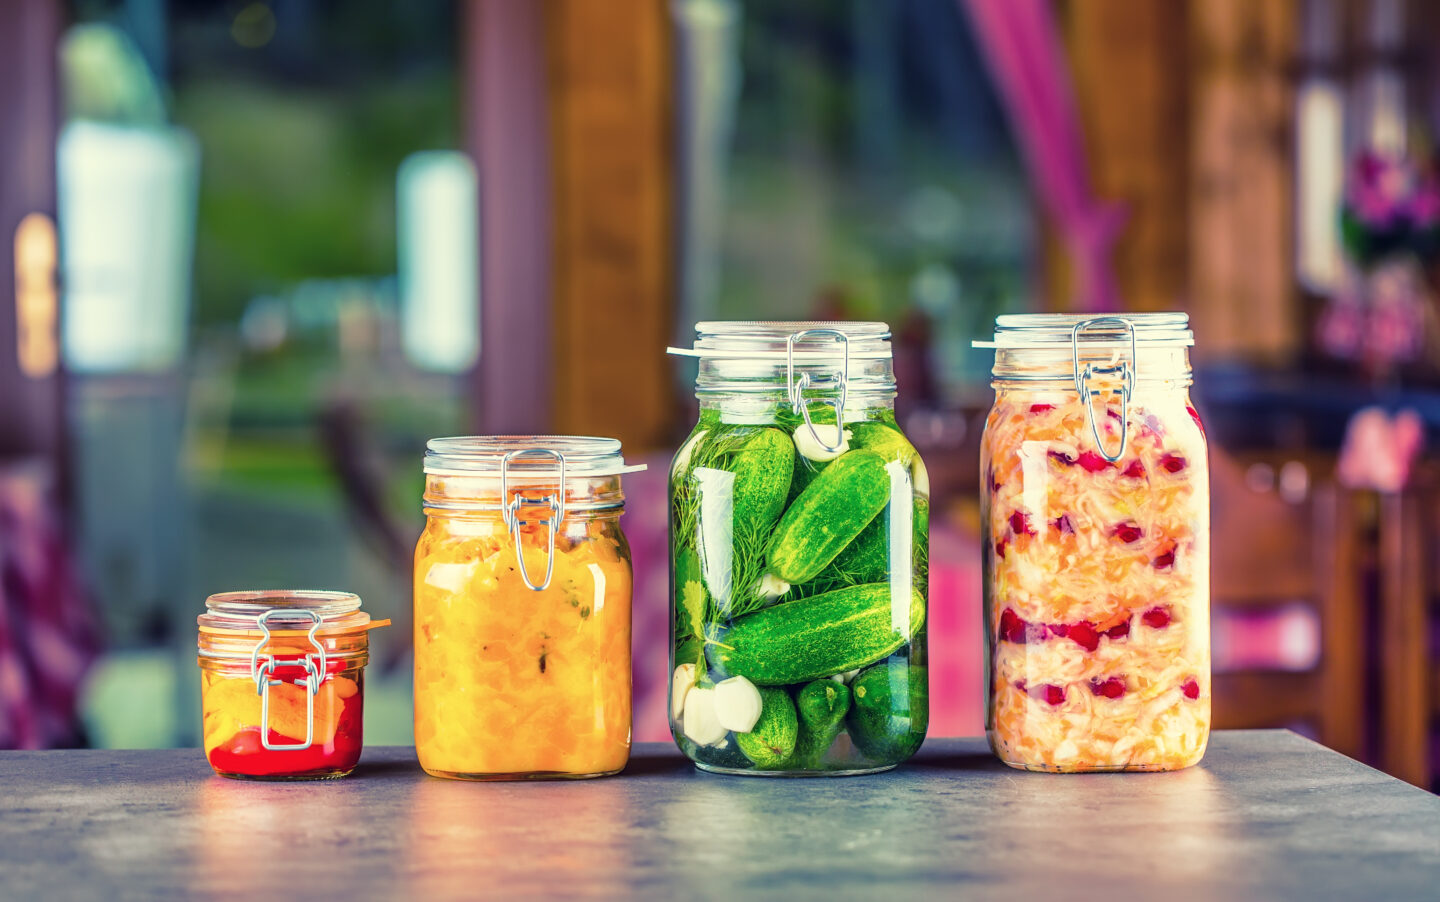
By following a few easy steps, you can ferment all kinds of vegetables at home, producing an array of tasty pickles that will stay crisp jarred up in your fridge for several days to several weeks. The art of lacto-fermentation originally came about, even before the advent of refrigeration, as a way to preserve the summer and fall vegetable harvest for consumption later in the year. But today, with cold storage, your tart, spicy, briny creations can last even longer, and they’re easy to prepare.
A Few Fermenting Tips
- For lacto-fermentation, use an unrefined salt (e.g., sea salt or Himalayan salt) with minerals intact—this can give it a pink or gray color. If using refined salt, look for options like kosher or sea salt that are free of anti-caking agents and other additives.
- For ferments using honey, choose high-quality honey, preferably from a local beekeeper. Generic grocery store honey often contains corn syrup, caramel coloring, and other additives that can affect flavor and fermentation.
- Place fermenting foods on a tray or in a container to catch overflow and prevent countertop stains. Fermentation produces gas bubbles that can force liquid out of your fermenter.
- “Burp” your ferments once a day (or every couple days if it’s cold): gently loosen the lid to allow excess gas that has built up during the fermentation process to escape. Top off with more brine if needed.
- Keep all fermenting ingredients submerged in brine to inhibit mold growth and keep out unwanted microbes. A lid works for small jars; larger ferments can be weighed down with a sanitized stone on a clean plate.
- Good bacteria are naturally present on all your substrates (fruits and vegetables). That’s why it’s important to use at least 50% fresh, raw vegetables to provide the bacteria needed for fermentation.
- Once your ferments reach the flavor you like, refrigerate them to slow the fermentation process to a near standstill, allowing you to enjoy them over time.
Avoid canning sauerkraut and other living foods, as the heat kills beneficial microbes. If you do want to can finished kraut, follow guidance from the Ball Blue Book or another trusted source.
Brine
Lactic acid bacteria (LAB) naturally present on vegetables can tolerate a brine solution with 1.5–5% salt, but 2–3% is ideal for flavor in most vegetable ferments. This is a great range to experiment with and find what you like.
For sauerkraut, you can estimate salt by eye, but if you’re just getting started, measuring can help build confidence. Don’t worry—there’s wiggle room! Vegetables like cabbage release their own liquid when salted, so you may not need to add additional brine. It takes some kneading to get the liquid flowing. On average, half a head of cabbage yields 1½ to 2 cups of brine. Based on the ratios below, that would call for roughly ½ tablespoon of salt, depending on cabbage size.
The science behind fermentation allows some room for variation, so don’t be afraid to experiment with different salt ratios. If you are unable to knead the cabbage to produce brine, you can use the pour-over brine ratios listed below.
Pour-over Brine
Pour-over brines can be used to ferment all kinds of fruits and veggies, such as carrot sticks, cucumbers, and more.
For 1 quart (or 4 cups) of water:
- 2% = 20 g or about 1 tablespoon
- 3.5% = 35 g or about 2 tablespoons
- 5% = 50 g or 2 ½ – 3 tablespoons
Pickled Carrots
- Cut your carrots into sticks or rounds.
- Add to a pint jar, leaving 1″ or more of headspace at the top.
- Pour your room-temperature brine (using salt ratios above) over the carrots to cover completely. Add any optional spices—for example, 1–2 tablespoons dill seeds or fresh dill, 1 clove garlic, and ¼–½ teaspoon crushed red pepper.
- Top the jar snugly (but don’t tighten) with a lid and place it on a plate or tray, out of direct sunlight but at room temperature. You can use a standard Mason jar lid or an airlock.
- “Burp” the jar daily: If carrots or spices float to the surface, press them down (or use a fermentation weight), or gently shake the jar once a day to disrupt the surface and discourage mold growth. If mold does appear, carefully remove it with a clean paper towel. The salt solution should prevent most harmful types.
- Allow to ferment for several days or longer, until the carrots have a flavor you enjoy. Follow your nose! A tart, pickle-like aroma indicates lactic fermentation. If the jar smells foul or rotten at any point, discard it. Once your desired tartness is reached, seal the jar tightly and store it in the fridge.
Sauerkraut
Ingredients:
- 1 head cabbage
- 1-2 Tbs. salt
- Spices (e.g., caraway, fennel, juniper berries), if desired
- Pint jars with lids and bands
- Remove the outer two layers of leaves from your cabbage and set aside.
- Quarter and core your cabbage, then thinly shred the leaves.
- Add cabbage to a bowl and sprinkle liberally with salt.
- Massage the salt into the cabbage until it begins to release liquid and form a brine. You’ll know it’s ready when the cabbage releases liquid when squeezed. (If making dill pickle kraut, see recipe below.)
- Pack the cabbage tightly into jars, pressing down to eliminate air bubbles. Make sure it’s fully submerged in its own brine. If needed, top off with pour-over brine (see above).
- For a simple weight, fold one of the reserved cabbage leaves and place it over the shredded cabbage and press it down. You can also use a sanitized round stone or a fermentation weight. Be sure the top leaf is fully submerged in brine.
- Place a lid snugly (don’t tighten) on the jar and set on a baking sheet or plate to collect any overflow. Allow to ferment out of direct sunlight for 2-3 weeks (or longer, if desired). Loosen the the lid and check your ferment every couple days, adding more brine if needed (about 1 tsp to 2 cups water).
- Loosen the lid and check your ferment every couple of days. Add more brine if needed—use about 1 teaspoon salt dissolved in 2 cups water.
Dill Pickle Kraut
After massaging the salt into the cabbage, mix in the following ingredients to taste before packing into jars:
- Fresh dill
- Dill seed
- Crushed red pepper flakes
- Prepared horseradish (the pickled kind, not creamy horseradish sauce)
- Minced garlic
This is a great opportunity to play with flavor and ratios. A common starting point is ½ to 1 tablespoon of each spice per head of cabbage, but feel free to adjust amounts or try other ingredients like black pepper or onion.
Kraut-chi
This method for making kraut-chi is similar to traditional sauerkraut: massage your vegetables with salt to draw out their juices and create a natural brine.
The term “kraut-chi” was coined by fermentation expert Sandor Katz to describe common sauerkraut variations made with a mix of vegetables—not just cabbage. Kraut-chi is a flexible way to preserve what you have on hand, such as grated root vegetables, hearty greens, or seasonal produce like corn.
A recent batch included grated beet, carrot, onion, foraged greens, ginger, purple cabbage, apple, and celery—most of which were nearing the end of their shelf life. Kraut-chi is an excellent way to use up vegetables that are softening (but not moldy). Visual perfection isn’t required—flavor and creativity take the lead!
You can also add kitchen scraps such as shredded or chopped carrot ends, carrot tops, chopped apple peels, or bits of grated root vegetables like beets or parsnips—or whatever else your imagination comes up with. Scraps that are especially delicate, like peaches or berries, should be added after salting the cabbage, but before packing it into jars. Avoid delicate greens such as lettuce, which tend to become slimy in this recipe.
If kneading is difficult due to arthritis or other physical limitations, you can simply grate or shred the vegetables and ferment them using a pour-over brine instead. For vegetables that don’t hold their shape well during massaging—such as fresh corn—add them after kneading and mix to distribute evenly.
Dr. Julia Skinner, one of the world’s leading fermentation educators, is the author of the award-winning Our Fermented Lives, is founder of The Culinary Curiosity School, and runs Root, a food-focused community and consulting organization that offers classes, consulting on creative projects, a weekly newsletter, and more. She also founded Roots and Branches, where she coaches writers to find their voice and share their work.
A nature lover, teacher, and traveler, Julia holds a PhD in Library and Information Science and splits her time between Atlanta and Cork, Ireland.
Share Post