[This article is the Novermber/December 2017 Zymurgy online extra]
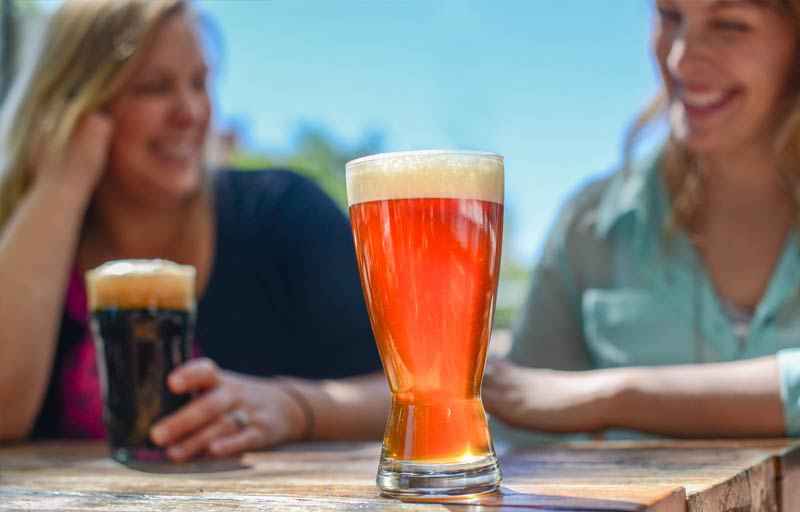
Session beers can be formulated using virtually any standard-strength beer as a template. They can be sour (Berliner weisse), malty (English mild), Belgian (patersbier), or hoppy (session IPA). In America, session beers are often ales, but many classic lagers, such as helles and German Pilsner, are sessionable at the low ends of their original gravity (OG) ranges. Vienna lager and rauchbier can be “sessionized” easily since their typical minimum OGs are near or slightly higher than what is commonly considered sessionable. Finally, Kölsch and altbier are two hybrid ales that can easily lend themselves to the session treatment. It is fair to say that brewers enjoy wide latitude in brewing session beer.
Session ales and lagers pose an interesting technical challenge because their light sensory profiles do not conceal mistakes in the brewing process, and one can easily create an unbalanced final product. To brew a quaffable beer, it is helpful to understand your ingredients and the technical limitations of your brewing system. To that end, there are a few common challenges one might encounter while brewing session beer, which we can broadly classify as technical or sensory in nature.
Technical Challenges in Brewing Session Beer
Technical challenges have to do with the brewing process, be it all-grain, partial-mash, or extract in nature. Brewers have to understand their systems and the inherent technical difficulties of their processes so they can modify hardware, process, and ingredients to compensate for any shortcomings. In session brewing, mashing and packaging warrant special discussion.
Control the Session Mash
During the mash, grains are soaked in a measured amount of water at one or more temperatures for given amounts of time as enzymes convert starches to simple sugars. As the mash progresses, some heat escapes the mash as steam and collects in the headspace of the mash-lauter tun (MLT). A mostly full MLT has a small amount of headspace relative to mash volume, the latter of which represents a large thermal mass. This results in slower heat loss to the environment. Conversely, a low-volume mash has less ability to store heat and allows a greater drop in temperature over the course of the mash.
The latter scenario is typical for a session beer, for which only 10 or 11 pounds of malt may be needed to brew a 5-gallon batch (4 to 5 kg for 19 liters). The heat loss varies between MLTs, but I’ve measured a twofold increase in the rate of heat loss when comparing a one-third full MLT and one that’s nearly filled to the rim. Poor heat retention can reduce the efficiency of starch conversion and lower sugar extraction. This can be rectified by either scaling up the beer recipe or increasing the temperature of the mash.
Scale Up the Recipe
By scaling up a session beer recipe, headspace is reduced and the mash becomes a larger thermal mass. Doubling the recipe makes for the simplest math, but any increase will work as long as headspace is reduced. As an added benefit, you get more beer for about the same amount of labor. The major caveat of scaling up a recipe is that a larger kettle might be cost- or space-prohibitive to some. If brewing a larger batch isn’t an option, one might consider increasing mash temperature to counteract heat loss.
High-Temperature Mashing
The brewer’s window is a temperature range in which both beta and alpha amylase work to break down starches to simple sugars with relatively high efficacy. That window is roughly 150 to 158°F (66 to 70°C). Temperatures at the lower end of the range favor beta amylase activity and more fermentable wort. However, at this low temperature, alpha amylase activity is much lower.
When we increase the temperature to the other extreme of the brewer’s window, alpha amylase activity increases, and the resulting wort tends to be sweeter and have a fuller mouthfeel from the presence of more dextrins in the wort. However, at higher temperatures beta amylase is quickly degraded and loses all enzymatic activity. Therefore, most single-temperature mashes tend to rest at around 152 to 154°F (67 to 68°C). In this narrow range, the enzymatic activity of beta amylase is protected while simultaneously squeezing some activity out of alpha amylase, yielding a fermentable but slightly dextrinous wort.
In high-temperature mashing, we turn the idea of protecting beta amylase on its head. We embrace the dead space in the MLT and simultaneously alter the mash duration, liquor-to-grist ratio, and temperature. The aim is to squeeze as much activity out of beta amylase as possible before it denatures in the high temperature of the mash. This is accomplished by increasing the mash temperature to approximately 158°F (70°C) and reducing the mash duration to half an hour.
A shorter mash works because most starch conversion is complete by the half-hour mark when using today’s highly modified malts.1 Session beers’ low original gravities mean less overall need for conversion anyway, and a higher mash temperature favors better extraction of simple sugars. The increased rate of beta amylase degradation can be countered by using a liquor-to-grist ratio between 1.8 and 2 quarts per pound (3.8 to 4.2 liters per kilogram).
This reduces the occurrence of product inhibition (a type of enzyme inhibition where the product of an enzymatic reaction binds to the enzyme and inhibits its activity) at the active site, which can slow down the forward progress of any enzymatic reaction. Cumulative high-temperature mashing strives to balance heat loss from a partially full MLT while driving enzymatic activity at a breakneck pace and improving the extraction of wort sugars at a higher temperature.
English Mild
Specifications
- U.S. 5 gal
- OG: 1.034
- 72% brewhouse efficiency
- 90 min boil
Ingredients
- 5 lb. Maris Otter
- 0.5 lb. light crystal malt
- 0.25 lb. dark crystal malt
- 0.25 lb. extra dark crystal malt
- 0.25 lb. chocolate malt
- 1 oz. UK Fuggles 4.9% a.a. (60 min)
- 1 pack English ale yeast
All Grain Instructions
Mash at 156°F for 30 minutes. Sparge until kettle is full or until runoff gravity is about 1.002. Add top up water as needed. Boil and cool wort. Transfer to fermenter and pitch yeast.
Extract Version
Substitute Maris Otter malt with about 5 lb. of Maris Otter liquid malt extract. Steep light crystal malt at 155°F for at least 20 minutes. Combine LME and water to a final volume of about 7 gallons depending on evaporation rate.
Packaging for a Long(er) Shelf Life
Whether you bottle or keg your brew, the package represents the final barrier between beer and the environment. The rich sherry or leather oxidative notes present in a well-aged English barleywine add complexity and character. These same compounds in a session ale are much less enjoyable and instead come off as papery and cardboard-like, with a thin and lifeless body. While it’s impossible to stop the flow of time, there are ways to slow the staling process.
Purge as Much as Possible
When packaging beer in a keg, the usual practice is to purge the keg with carbon dioxide (CO2) prior to closing the hatch. There are a few variations on this technique, but the standard equipment involves a CO2 tank attached to a keg though the gas-in post. The easiest approach is to sanitize the keg and the inside of the dip tube with your sanitizer of choice, dump the sanitizer into a bucket for later reuse or temporary storage, and then purge the keg a few times using the pressure release valve (PRV) to completely depressurize the keg before adding more CO2.
This can be taken a step further by driving the sanitizer from the keg with CO2 rather than dumping it into a bucket. This approach is a more efficient way to purge the keg of as much oxygen as possible. In any purging protocol, beer can be siphoned into the keg opening, or CO2 can be used to push the beer from the fermenter, though a racking cane, and into the keg though the dip tube.
The former method is easier, but the latter better prevents oxygen ingress into the beer. In either case, the dip tube can be used to bubble CO2 through the beer as it fills the keg. Adding a T-splitter connected to a black liquid disconnect allows simultaneous CO2 injection through the dip tube and the gas-in post while racking beer though the corny opening (Figure 1). This further purges the headspace of the keg while bubbling CO2 though the beer. Alternatively, this technique can be used to de-aerate water to dilute a stronger beer to session strength after fermentation. However, care should be taken to avoid stripping desirable aromatic compounds from the finished beer.
Purging While Bottling
Removing CO2 from the headspace is more difficult when bottling. Using a counter-pressure filler is a great way to flush an empty bottle with CO2, and a little puff of CO2 into the headspace before sealing can remove residual oxygen. However, this approach presupposes kegging. A simple bottle purging device can be constructed from a length of stainless steel tubing (part of a retired dip tube for example), some gas tubing, and a spare valve to permit easy CO2 discharge.
Simply stick the (sanitized) tube into the (sanitized) bottle and hit it with a puff of CO2 for a few seconds. Remove the purging device and cover the bottle with foil or a cap. CO2 is denser than air so once the bottle is purged there is a low chance that the gas will vacate the bottle quickly. The source of gas is up to you; dedicated bottle conditioners can work with a small 20 oz. paintball tank or 16 g CO2 cartridges and their associated mini regulators. For people who also dabble in kegging, gas disconnects offer an excellent way to quickly and easily utilize a 5, 10, or 20 lb. CO2 tank for multiple applications.
Sensory Challenges in Brewing Session Beer
A major challenge with session-strength beer is that bold, robust flavors can easily result in an aggressive or one-dimensional beer. The light profiles of session beers do not offer much room for mistakes, but an excellent practice is to establish a sensory hierarchy.
All session beers have some flavor elements from malt, hops, and yeast. In a sensory hierarchy, the brewer decides which of the three is most important and assigns the other two supportive roles as secondary or tertiary elements. This idea is illustrated in Table 1, with three different styles and a possible sensory hierarchy of each.
Table 1: Sensory Hierarchy of Session Beers
| Beer | Malt | Hops | Yeast | Profile of the Final Product |
| Session pale ale | Secondary | Primary | Tertiary | Hoppy, somewhat malty, clean beer. |
| English mild | Primary | Tertiary | Secondary | Malty, slightly sweet and fruity, with little hop bitterness. |
| Traditional patersbier | Tertiary | Secondary | Primary | Crisp fruity and phenolic beer with hops to enhance crispness and just a little sweetness. |
This basic premise emphasizes simplicity in brewing and encourages contemplation of the final sensory profile of the beer. However, this only serves to establish a basic profile. A number of techniques can be utilized to work additional layers of flavor and aroma into session beers without obfuscating the base style.
Steep Specialty Malts/Grains
Extract and partial-mash brewers are accustomed to the process of steeping crushed specialty malt in warm water and adding it to the boil with dry or liquid extract. However, steeping malts can also be helpful for all-grain brewers who want to make session beers.
A session beer mash can have less buffering power than the mash for a normal strength beer, and mash pH can more readily approach and exceed 6 during sparging. Above this value, conditions are more favorable for tannin extraction. In session beers, even low astringency could be noticed in the final product when paired with a dry finish or higher hopping rates. The solution? Just steep any specialty malts and grains at 155°F (68°C) for 10 or 15 minutes.
Cold steeping with 40–50°F (4–10°C) water is ideal for roasted grains or malts. To compensate for the lower temperature, more time is needed; I try to allow 18 to 24 hours. The end result may present a more subdued malt profile. For example, a dry stout could have more of a dark chocolate character than coffee. Whether warm or cold steeping, the same liquor-to-grist ratio can be used. I’ve had luck keeping it between 2 and 3 quarts per pound (4.2 to 6.3 liters per kilogram). A soup pot on the stove works well for warm steeping, and I use an old water pitcher for cold steeping.
Promote Browning Reactions
Kettle caramelization and Maillard products give decoction mashed beers that little something extra, and both chemical reactions can add extra layers of complexity to session beers. However, water reduces the rate of caramelization and Maillard product formation. Because the ratio of sugar to water in session beer is much lower than in standard-strength beers, the conditions for product formation and caramelization are not ideal.
A workaround is to collect 0.5 to 1 gallon (1.9 to 3.8 liters) of first runnings or wort from the kettle. Bring this liquid to boil over high heat on the stove top and continue boiling until volume is reduced by 50 to 75 percent. As the volume reduces, be sure to stir to prevent scorching. Once reduced, just pour the resulting liquid back into the boil kettle, or cool and add to the fermenter.
Multiple Yeast Strains
The microbe used by the brewer determines if a beer has the ester- and phenol-rich profile of a Belgian ale or the fruity profile of an English beer. Pitching two different strains of yeast into a single fermenter can create an interesting synergy, but it can also mute prominent yeast products or introduce layers of complexity via low levers of souring. More control can be exercised when a single boil is split to two fermenters. Each gets a unique strain of brewing yeast or bacteria. Following fermentation, use a sampling wand to pull a cup or two of beer from each fermenter. Combine each beer in measured ratios (1:1, 2:1, 1:2, etc.) to find a profile that most suits your palate. Scale up the ratios appropriately to fill the bottling bucket or keg.
Stout + Bitter
Specifications
- OG: 1.034
- U.S. 10 gal (5 gal. stout and 5 gal. bitter)
- 72% brewhouse efficiency
- 90 min boil
Ingredients
- 11 lb. Maris Otter
- 1 lb. light crystal malt
- 0.5 lb. chocolate malt
- 0.5 lb. roasted barley
- 2 oz. UK Fuggles 4.9% a.a. (60 min)
- 2 packs English ale yeast
All-Grain Instructions
The day before brew day, place chocolate and roasted barley in muslin bag and soak in 1 quart of water. Place in fridge overnight. Mash Maris Otter and light crystal malt at 152°F for 1 hour in 6 gallons of water. Sparge until kettle is full or until runoff gravity is about 1.002. Add top up water if needed. Separate dark grains from water and boil for at least 15 minutes. Let cool and add to a sanitized fermenter. Boil and cool wort. Transfer half of wort into the fermenter with sterilized dark grain wort for session stout. Transfer remaining wort to a separate fermenter for the bitter. Pitch yeast.
Extract Version
Substitute Maris Otter malt with about 9.8 lb. of Maris Otter liquid malt extract. Steep light crystal malt at 155°F for at least 20 minutes. Combine LME and water to a final volume of about 12 gallons depending on your evaporation rate.
Hop Infusions
Hops can be added at just about any point in the brewing process. Infusions are an excellent tool with which to add additional aromatic compounds without the risk of increased bitterness from hot side additions or the grassy character that can come from cold side additions. Infusions take advantage of the fact that many hop compounds are alcohol soluble. Soak whole (ideally) hop cones in a neutral spirit and filter out hop matter. This should be carried out in a cool, dark place to prevent oxidation and skunking. The resulting liquid can be dosed into a keg or bottling bucket.
To paraphrase Steve Parks (Owner and Brewmaster of Drop-In Brewery and the lead instructor of the American Brewers Guild), “Your beer should be so good that people should want to drink a six pack.” It is a sentiment that I think anyone who makes beer can get behind. Session beer makes it achievable while allowing the drinker to stay sharp enough to fully experience and enjoy the subtleties of the beverage.
For all their simplicity, session beers can be as challenging to brew well as the most robust of barrel-aged coffee imperial stouts. However, armed with a firm understanding of the limitations of your brewing system and a firm focus on your desired sensory profile, there’s no reason you can’t produce a variety of sessionable brews to suit your personal tastes.
Adam Ronchetti is a scientist and homebrewer from Mundelein, Ill. His two major passions in life are good beer and the outdoors. His longing for all things session stems from their extreme drinkability around the campfire after a good day of hiking or rock climbing.
Resources
- Palmer, John. How to Brew. Boulder, CO: Brewers Publications, 2006.
Share Post