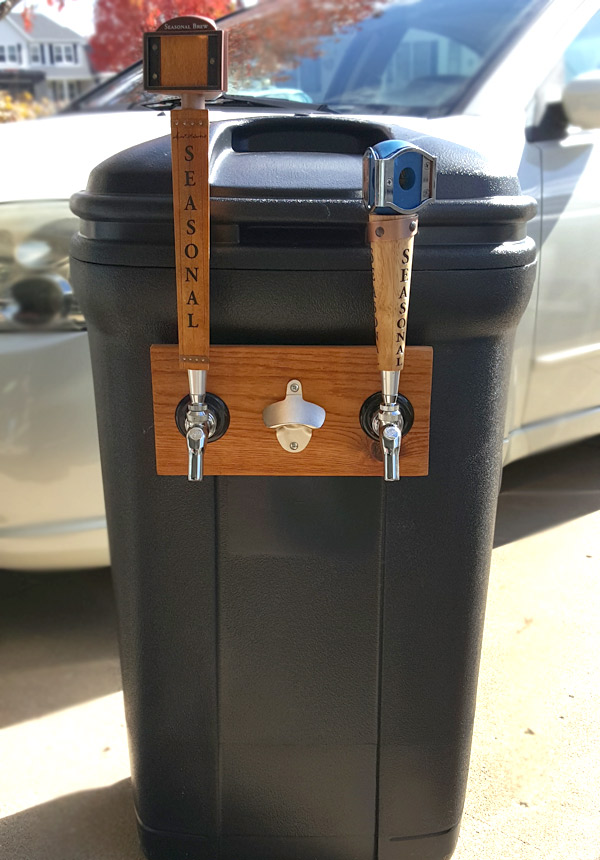
Josh Becker, an Illinois-based homebrewer, has created a unique tradition with his brother and best friend. The three share birthdays within weeks of each other, and every year they threw a Birthday Trifecta bash, and, of course, there is homebrew.
Becker used to dismantle his 10-gallon mash tun so he could fill it with ice and immerse the keg to keep it cool while serving homebrew at the annual birthday bash and other events. This worked well, but constantly dismantling and rebuilding his homebrew equipment was enough to have him searching for a new solution. After seeing a trash can converted into a kegerator at a wedding, he decided to take the concept and make it work for a homebrew keg setup. This was the beginning of Becker’s Trash Can Kegerator.
How to Build a Trash Can Kegerator
Becker’s goal was to create something to serve kegged homebrew that was easy to transport and inexpensive. You may have some of the following tools and materials on hand, which will make the project even cheaper!
Materials
- 32-gallon plastic trash can
- One stained piece of scrap wood*
- Beer lines
- Keg shanks, connects and taps
- Optional: mountable bottle opener
Tools
- Large drill bit and drill
- Saw*
- Wrench
- Screwdriver
*The size of the piece of the wood will depend on the size of the trash can. A saw may be needed to cut wood to size.
Instructions
The entire process of building the trash can kegerator took Becker under two hours. Basically, a piece of wood is mounted on the front of the plastic trash can, which will hold the mounted keg faucets. The keg is set up inside the trash can, along with the CO2 tank, and ice is added to keep everything cool. That’s it! Here are the steps:
- Ensure the piece of wood being used is the size you want to be on the front of the trash can. Cut it to size, if necessary. Stain wood if desired.
- Using the appropriate sized drill bit, drill holes through the wood piece where the keg shanks will be mounted.
- Using the piece of wood that has been drilled as a guide, mark where the holes should be drilled on the trash can. Drill holes through the trash can.
- Fit the shanks through the wood and trash can. No glue or mounting of the wood is necessary since the washer of the shanks will hold everything secure.
- Optional: add a mountable bottle opener onto the piece of wood.
- Hook up all the beer and gas lines. Make adjustments to prevent foaming, if necessary.
- Place the keg in the trash can and surround with ice.
- Pull the faucet and watch delicious homebrew come from your DIY trash can kegerator!


Share Post